
将 IFTTT 与 ProtoPie Connect 一起使用
什么是 IFTTT?
IFTTT 是一项网页自动化服务,可与多种设备和服务集成,包括 Twitter、Dropbox、Evernote、Fitbit、Amazon Alexa,以及 Google Assistant。
IFTTT 代表 “If This Then That(如果这样就那样)”,你在 IFTTT 中创建的 Applet 与 ProtoPie 的触发器和响应工作方式类似:如果这件事发生——那么那件事就会发生。
了解更多 IFTTT Applet。
IFTTT 插件如何工作?
ProtoPie Connect 通过称为 Webhooks 的消息与 IFTTT 的合作服务通信。它们与 ProtoPie 中的发送和接收消息类似。一条消息(“事件”)会发送到 IFTTT,作为响应,IFTTT 会将该消息转换为一个操作。
通过将 ProtoPie Connect 与 IFTTT 的 Webhooks 结合使用,你可以将原型连接到其所有合作的网络服务和设备。
在 IFTTT 中创建 Applet
在 IFTTT 网站上创建一个账户。
配置触发器

登录后,点击 IFTTT 页面右上角的 Create
在 If This 部分点击 Add,并搜索 Webhooks
选择“Receive a web request”
为你的事件命名并点击 Create Trigger。名称中只能使用字母、数字和下划线(例如:“send_email”)
配置操作

在 Then That 部分点击 Add 按钮
在 Choose a service 字段中搜索你想要的操作
例如,“Gmail” - “Send yourself an Email”
填写“Subject、Body、To address、CC address、BCC address 和 Attachment URL”部分。点击 Add ingredient 按钮最多可添加 3 个可自定义值(”Value1, Value2, Value3”),这些值需要在 ProtoPie Studio 中进行配置(请参见在 ProtoPie Studio 中配置消息)
点击 Update Action
检查你的 Applet,然后点击 Finish
将 IFTTT 连接到 ProtoPie Connect
配置 ProtoPie Connect 以向 IFTTT 发送请求。
测试你的 Applet
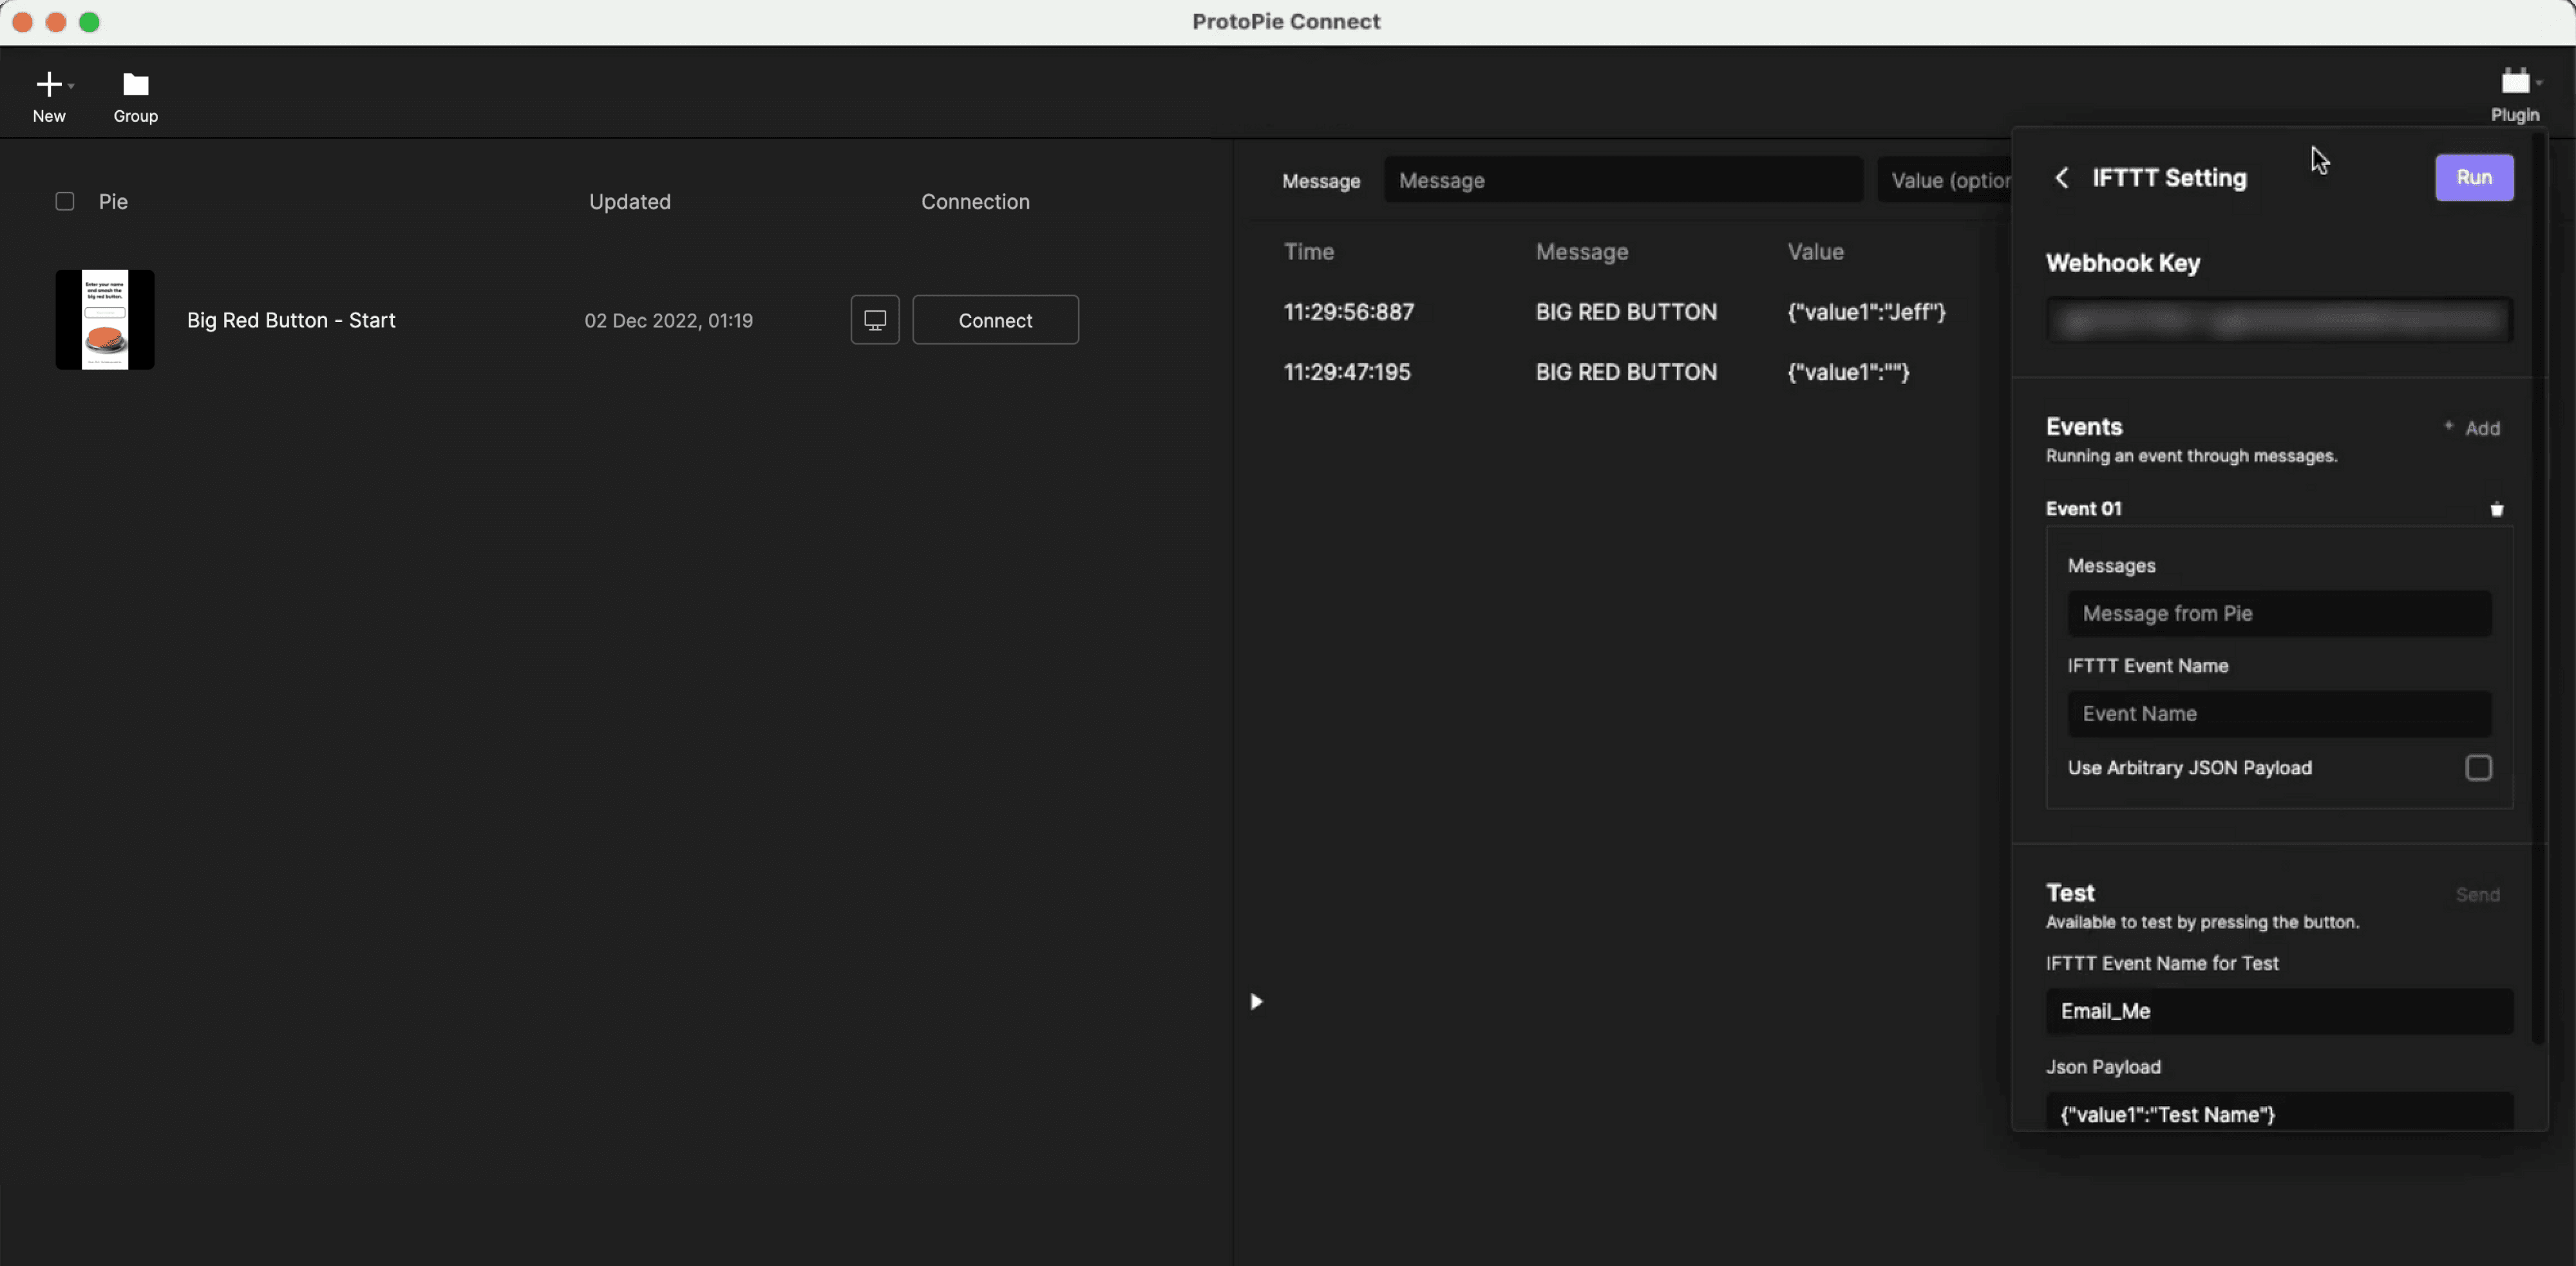
打开并登录 ProtoPie Connect。
在插件下拉菜单中选择 IFTTT。
复制并粘贴你的私有 Webhook Key,你可以在 IFTTT 网站的 Explore → ”Webhooks” → Documentation 下找到它
点击 Run 按钮
你可以在 Test 部分测试该 Applet
输入你的事件名称和 JSON 负载
点击 Send
你可以前往 IFTTT 网站上的 My Applets 并点击 View activity,以验证你的 Applet 是否正常工作。
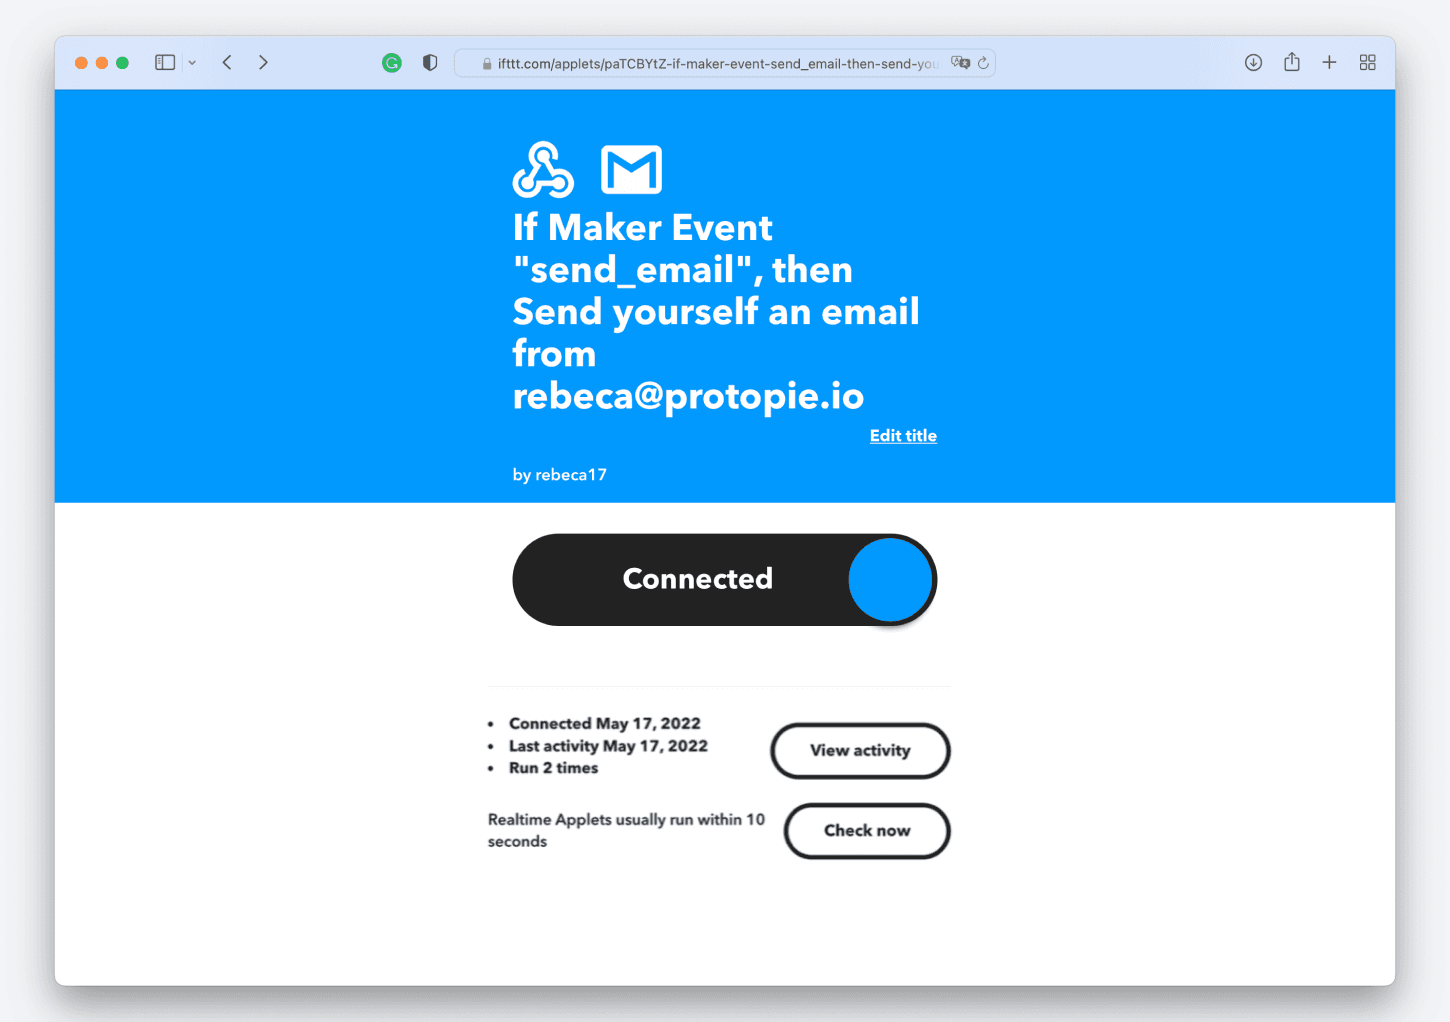
你将收到一封电子邮件,其中包含 JSON 负载中指定的值。
在 ProtoPie Studio 中配置消息
现在你已经创建并测试了 Applet,接下来需要在原型中使用 ProtoPie Studio 配置相应的消息。
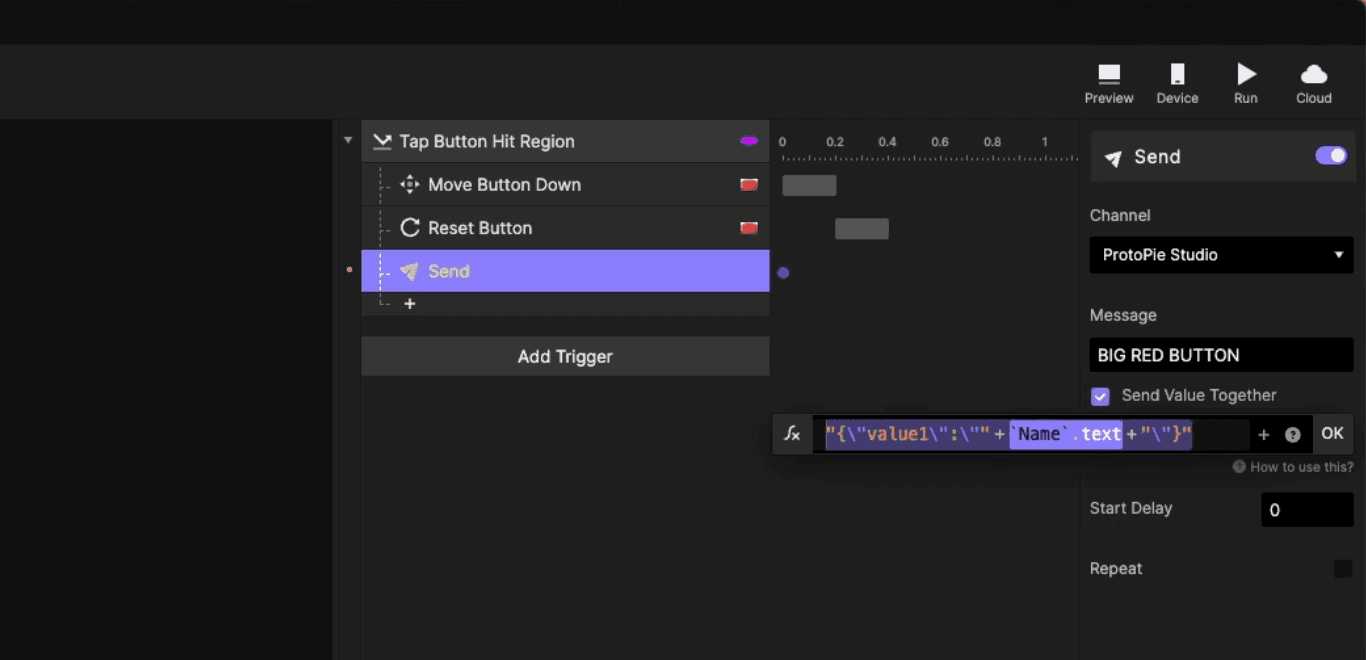
设置将触发 Applet 中操作的 Send 响应。
使用通道“ProtoPie Studio”与 ProtoPie Connect 通信,并启用“Send Value Together”。
如果你在 IFTTT Applet 中使用了一个或多个值,请配置你的 JSON 负载值。
在 ProtoPie Connect 中测试原型